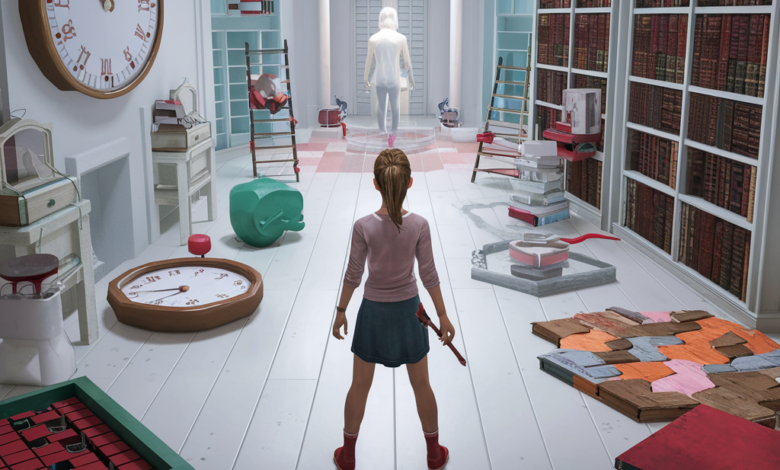
The White Room 5 is the latest installment in the popular escape room puzzle series by Rusty Lake-style indie developers. Set in a sterile, minimalist environment, the game challenges players to rely on logic, observation, and patience. Unlike its predecessors, The White Room 5 takes the surrealist design further with new puzzles, hidden compartments, and abstract symbolism.
This complete walkthrough breaks down every step required to solve the game, from initial exploration to the final escape. Follow each section carefully to progress through the white room, unlock hidden objects, decipher codes, and escape successfully.
Understanding the Gameplay Mechanics of The White Room 5
Before diving into the walkthrough, understanding the core mechanics of the game is essential:
-
Point-and-click navigation using interactive arrows and screen edges
-
Inventory management with drag-and-drop functionality
-
Puzzle-solving involving numeric locks, color patterns, sound clues, and symbol decoding
-
Hidden object interaction requiring players to click on subtle environmental details
Each item and clue in the game is significant, and there are no red herrings. Everything you find plays a role in solving the overall puzzle.
Starting the Game – The First Wall (North Wall)
Step 1: Inspect the Table
-
Click the white table in the center of the room.
-
Pick up the silver key from underneath the table.
-
Examine the notepad on the tabletop: it displays a cryptic drawing of four colored squares red, green, yellow, and blue in a particular sequence. Memorize the order.
Step 2: Open the Drawer
-
Use the silver key to unlock the drawer on the wall-mounted cabinet (located to the left of the table).
-
Inside the drawer is a note with shapes (circle, triangle, square, star) and a small screwdriver.
South Wall – Puzzle Panel and Clock
Step 3: Examine the Wall Clock
-
The clock is frozen at 3:45. This will be used for a puzzle later.
-
Click the clock face to reveal a hidden compartment containing a rolled paper it’s a symbol reference chart showing what each shape corresponds to numerically.
Step 4: Open the Shape Lock Safe
-
Find the panel with shape symbols on the right side of the wall.
-
Using the symbol chart, match the shapes from the note to their numerical counterparts.
-
Enter the correct four-digit combination (based on symbol-note match).
-
The safe opens to reveal a battery and a strange half-disc object.
East Wall – Mirror, Power Panel, and Hidden Slot
Step 5: Inspect the Mirror
-
The mirror appears normal but has a loose edge. Use the screwdriver to pry it open.
-
Behind it, you’ll find a keypad and a slot for a battery.
-
Insert the battery, and the keypad activates.
Step 6: Enter the Color Code
-
Recall the color order from the notepad: Red – Green – Yellow – Blue.
-
Tap the keypad colors in the same sequence.
-
The wall opens to reveal a strange dial and a second half-disc.
West Wall – Bookshelf and Floor Hatch
Step 7: Explore the Bookshelf
-
Pull books in the order of their spine colors matching the previous color code.
-
A hidden compartment opens to reveal a key with a triangle symbol and a mirror shard.
Step 8: Unlock the Floor Hatch
-
Find a square tile on the floor with a small triangular hole.
-
Insert the triangle key.
-
The hatch opens, revealing a ladder leading down but it’s dark.
Assembling the Projector Puzzle
Step 9: Power the Projector
-
Locate the projector on the south wall shelf.
-
Insert both half-disc objects into the top compartment they form a lens.
-
Plug in the battery-powered cable from earlier.
-
Projector activates and projects symbols and numbers on the opposite wall.
Symbol Order Displayed: Star – Triangle – Square – Circle
This sequence will unlock a master safe.
Final Wall Safe – Escape Code
Step 10: Decode the Escape Safe
-
The wall safe on the east wall now glows faintly.
-
Input the number sequence corresponding to the symbol order above using the previously found symbol-number chart.
Example: If Star = 7, Triangle = 2, Square = 4, Circle = 1, then the code is 7241
-
The safe opens, revealing the exit key and a note that reads “Look in the light.”
Final Puzzle – Escape the White Room
Step 11: Solve the Light Puzzle
-
Return to the mirror and tap the corners; this opens a false wall behind it.
-
Inside, you’ll see a series of colored lights flashing in sequence.
Flash pattern: Blue, Red, Yellow, Green
-
Match this light pattern with the buttons on the floor hatch panel.
-
The hatch now powers up click to descend.
Descending the Hatch – The Final Room
You’ll find yourself in White Room Sub-Level 1, an extension filled with even more puzzles. However, for the purpose of The White Room 5’s main escape, your objective ends when:
-
You’ve correctly input the light code
-
Activated the hatch mechanism
-
Used the exit key to open the final door at the bottom of the ladder
A cinematic plays, and the game ends with an ambiguous message:
“What is white is never empty. Continue searching.”
Tips and Hints for The White Room 5
-
Click everywhere: Some items are hidden in subtle places.
-
Use headphones: Audio cues help with light and sound puzzles.
-
Take notes: Symbols, numbers, and colors often appear again later.
-
Do not rush: Some puzzles require step-by-step input that resets if done incorrectly.
-
Observe changes in the environment after unlocking new areas.
Conclusion
The White Room 5 offers a uniquely immersive escape room experience with layered puzzles, symbolism, and abstract storytelling. Its minimalist design is deceptive; beneath the surface lies an intricate web of logic and pattern-based challenges. This walkthrough provides the complete path to solving all major puzzles, ensuring a satisfying escape without unnecessary frustration.